Friday, November 29, 2013

Sew Fabric Christmas Ornaments Safe for Small Children, No Sewing Machine Required

 
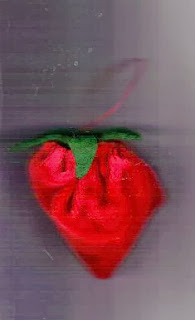
Red fabric Christmas ornament shaped like strawberry
Strawberry for Full-Size Christmas Tree
 
You've probably started your Christmas crafts already, but there is always time for more fabric slashes and stitches to round out the holidays. I'm making some fruit Christmas ornaments from cotton, satin and felt scraps and thought I would share them with you. These are made entirely by hand, so you can make them while watching television or chatting. You'll need a needle and thread and fabric scraps.
 
My grandchildren are 2 this year, so not all ornaments are safe, and the wire hangers we all use are especially unsafe for little ones. You can make ornaments small children can enjoy by using fabrics and thread, with thread hangers. As the children get older, you may want to add decorations that you can't use now -- buttons, beads, sequins or rolling eyes. You still have to watch a small child with any Christmas ornament, especially if he still put things in his mouth.
 
These are all simple, but original patterns and ideas you are welcome to try.
 
Start with scraps of fabric and choose some shapes you'd like to hang on a tree. A large tree will need full-size shapes; a small tree can use small ones.
 
Here are some of the fruits you can make, with a little imagination: Strawberries, apples, lemons, cherries, tomatoes, cherry tomatoes, oranges, and maybe grapes, with lots of patience.
 
Round red Christmas ornament representing apple or tomato
Tomato or Apple Christmas Ornament Handmade
 
Round green fabric Christmas ornaments resemble white grapes
Could these be Grapes? Need Several to String Together
 
All the round fruits take a full circle, just like yoyos. A 2 or 2 1/2 inch diameter circle makes smaller fruit, and a 3 1/2 inch circle makes larger pieces of fruit.
 
Choose a color that resembles the fruit, but it doesn't have to be solid colors. Cherries, strawberries, tomatoes, cherry tomatoes, red apples can be made from shades of red fabric. Represent lemons and star fruit with yellow, and grapes with purple or green. 

Cut the circles for the size fruit you want to make, except for the strawberries. Use a larger circle cut in half and make two strawberries from one circle. See more directions below for the strawberry.
 
Fold about 1/4 inch at the wrong-side edge of the circle and secure the thread with a couple of stitches on top of the knot-- you'll be pulling on it later and need it to be anchored. Stitch around the circle with wrong sides together until you get all the way around. For a lemon, I take a few tacking stitches in the center to resemble the bottom and use a round green circle for the top.
 
Yellow circle with stitching around edge
Cut a Circle and Stitch Around It for Round Fruit Ornaments
 
 
Yellow fabric Christmas ornament shaped like lemon
Completed Lemon with Stitching Gathered Tight at Top
 
For the strawberry, fold a half circle in half with right sides together and stitch up the side. Tack. Fold about 1/4 inch of the raw edge at the top, wrong sides together and tack the thread. Straight stitch around the semi-circle until you're all the way around. Turn the strawberry so the inside can be stuffed. 
 
Red half circle stitched up side and around edge for ornament
Strawberry Requires Half a Circle Stitched Closed
 
 
Red semi-circle and star cap makes strawberry Christmas ornament
Strawberry Christmas Ornament with Star Cap
I use felt for filling the fruit -- scraps, strips, small pieces left over. Once the fruit is stuffed, pull the thread to gather it tight at the top. Take a few stitches to secure it, then add a top piece. A cap for a strawberry or tomato looks like a star, or you can add a stem for an apple, or leaves.
 
Green felt fabric used for cap for tomato and strawberry Christmas ornaments
Cap for Tomato, Strawberry Christmas Ornaments
 
 
Secure the top, then loop the thread two or three times to make a hanger for your fruit. Tack the hanger loops in place and cut the thread.
 
Your fruit Christmas ornaments don't have to look real. You can make fictional pieces and let the children imagine what fruit they represent. Children love magic, and may find that the best Christmas ornaments don't represent anything they've ever seen.
 
Printed fabric makes fruit Christmas ornaments
Start with a Fabric Circle and Stitch Around the Edge for Gathers

Green printed fabric with solid red star cap makes fictional fruit Christmas ornament
Complete a Fictional Fruit with Christmas Colors
 
We hope you get pleasure from crafts and creating safe and inexpensive Christmas ornaments, and that you have a wonderful Christmas season!
 
See you soon.
 
Linda
 

Monday, October 21, 2013

Identifying Quilts by Era of Production

 
We're often asked about old quilts and textiles, and sometimes we're helpful in placing items into perspective by style and fabric.
 
Vintage quilt has cotton seeds visible in the light.
Old Quilt with White Background
 
 
If you haven't worked with fabrics all your life or if you aren't as old as we are, you may not know some of the characteristics of the eras. Here are some tips that may help you identify when your quilt was made.
 
Nineteenth Century quilts are often made of wool and dark colors. Twentieth Century quilts are lighter colors and fabrics. Typically, colors during wartime are darker than in peace.
 
Hold the quilt to the light. Quilts were made with batting that had cotton seeds early in the 20th century, and holding a quilt up to the light shows what the batting looks like. If it has seeds and isn't consistently the same throughout the quilt, you may have an early 20th century quilt. The quilt above with the white background and the fan pattern shows cotton seeds when held to the light.
 
Feel the fabric. Quilts after about 1960 were often made of permanent press fabrics, after these fabrics were available. Dupont introduced nylon in 1938 and Dacron about 1950. Ruth Benerito, credited with developing permanent press fabrics, recently made the news upon her death at 97.
 
http://www.nytimes.com/2013/10/08/business/ruth-benerito-cotton-chemist-of-permanent-press-renown-dies-at-97.html?_r=0
 
Quilts before the late 1950s used primarily cotton, but sometimes were made of linen or wool. Feed sack prints were common during the 1930s and 1940s, and these were coarse fabrics with small flowers, usually on white or off-white background. Quilts from the 1970s may be double knits fabrics, a heavy polyester that didn't wrinkle, but was heavy and not always comfortable. 
 
Fan quilt block showing typical 1940s and 1950s fabrics.
1950s Quilt with 40s and 50s fabrics
 
Look at the Style. Watercolor quilts weren't popular until about 1980 or so, so if you have one, you'll know that the style tells you that it's more recent than that. You can check online to see when a quilt pattern or design was developed. Some patterns have been around for more than a century, while other blocks are recent designs by quilting artisans.

Watercolor quilt with flower patterns in light to dark hues
Watercolor Quilt

 
Look at the colors. Each decade has a color scheme, although the colors weren't as obvious in some decades as others. Colors in the 1950s were teal, chartreuse, pink and gray together, and speckled. The 1960s transitioned from psychedelic to yellow and blue, and by the 1970s, we were into orange and green in large designs. Avocado, coppertone and harvest gold were colors of appliances, and that carried over into fabrics.
 
We saw popularity of soft colors in the 1980s, such as spring green, mauve and shades of purple and blue, and those colors became forest green and burgundy by the 1990s. We're back to a little brighter palette now, after a few years of natural colors, chili pepper red and steel.
 
Use your instinct. Some quilts just look old, and they may be. Others look new. Quilts may be made of old fabrics or old blocks in another decade. We've been working on some 50s blocks for several years, but the quilts, when completed, look new. In fact, a few of the blocks have a yellow poly-cotton fabric added.

50s pieces with recent addition of yellow fabric to complete block
These old blocks are from the 1950s, but yellow was added later
Study the quilt. Look at the thread used in addition to the color of thread. Imported quilts often use white thread with about 5 stitches to an inch. American quilters like smaller stitches closer together. Cotton covered polyester and nylon quilting thread are signs of a newer quilt than cotton twine. Check the binding and how it's made. Purchased binding has been available for more than 50 years, but many quilters make bias binding from fabrics from the decade of the quilt. The more you examine quilts, the more you'll see the differences in old and new.
 
See you soon!
 
Linda
cajunC


Sunday, September 8, 2013

Ribbon Crafts -- Make Your Own Crafting Tool

Purple ribbon flower made with cardboard wrapper
Flower Made with Cardboard Wrapper


Crafting sometimes requires innovation, and occasionally I need a tool I don't have available. A Scrap Wrapper is a plastic gadget like a ruler with a slit in the center that has room for your sewing machine presser foot. It makes a large fringe for cotton rugs, but I want to make tiny flowers that look like carnations for ribbon crafts, or smaller fringe. 


Ribbon embroidery carnation made with seam gauge
Carnation for Ribbon Embroidery
You can use a seam gauge for a ribbon wrapper. Slide the stop to one end and start wrapping the ribbon from one end to the other. Don't overlap and don't wrap tightly. Cut the end of the ribbon. Go to the sewing machine and stitch in the center opening of the seam gauge to the end. Pivot the gauge and stitch back to the starting point. Leave some thread to pull for gathers when you're done.
Silk ribbin wrapped on seam gauge
Wrap Silk Ribbon on the Seam Gauge
Silk ribbon cut on each side and removed from seam gauge
Silk Ribbon from Seam Gauge
 
Cut each side of the ribbon with scissors by sliding the sharp point under the ribbon even with the wrapped edge. Cut the ribbon on both sides and pull it through the seam gauge from the center. Now you have a ribbon that can be gathered into a carnation for ribbon embroidery. Pull the thread to make the gathers and roll the ribbon into a round. Use the excess thread to wrap the back tight to keep the flower shape.


Two cardboard strips with stapled end piece for ribbon crafts
Make Your Own Scrap Wrapper
Ribbon wrapped and stitched on cardboard scrap wrapper
Wrap Ribbon From End to End and Stitch in Center
 
 
You can also make your own scrap wrapper with cardboard. Here's the easy way: Cut two strips of cardboard about half an inch wide and 20 inches long. Cut two squares of cardboard about 2 inches square. Line the strips parallel to each other and place a square on each end. Staple the squares in place. Wrap ribbon (I used 3/4 inch ribbon) on the two strips. Don't wrap it tight or you won't be able to sew between the strips.
 
Purple 3/4 inch ribbon removed from cardboard wrapper
Ribbon Removed without Cutting Sides
Ribbon ready for gathering for ribbon crafts
Ribbon Cut on Sides Before Removing
Sew between the strips from one end to the other, pivot and return slightly to the side of the first row of stitching. (This makes it easier to gather.) Leave enough thread to pull for gathers. Cut the ribbon on each side of the strips and pull it out through the middle opening.
 
Alternatively, if you would like to have puffy ruffles that aren't cut, remove one square you stapled on the end of the cardboard wrapper and slide the stitched ribbon off the strips.
 
Pull the thread to gather the ruffle and use it for your crafts projects. This could make a garter for a wedding or an adornment for just about any fabric crafts project. You can also make flowers by cutting a fabric circle for backing. Starting in the center, stitch the ribbon in a continuous circle from small to larger.
 

Ribbon wrapped in circle to form flower shape
Flower Made from Uncut Ribbon
 Happy crafting! 

Linda
http://www.cajunc.com

Friday, July 26, 2013

Silk Ribbon Embroidery on a Miniature Scale -- Jewelry and Ornaments

Completed design worked on black moire can be made into jewelry or ornament
Silk Ribbon Embroidery on a small scale
 
Ribbon embroidery pins, pendants, bracelets or Christmas ornaments are creative crafts with fast results. Make your own design or purchase a book of small designs. You can make your miniature needlework item square, round or heart shaped. 
 
You'll need:
 
A small piece of fabric for the background
Embroidery floss
Needle
Silk ribbon in 4mm size and maybe 2mm size in colors you want to use
Cardboard for a template
Felt or your choice of backing for your completed piece
Pin back if you want to make a pin


I started with about a 3-inch circle, using a template cut from cardboard, and used black moire fabric for the background. I cut the moire to the 3 inch size, but started the embroidery about half to three-quarters of an inch from the edge all around. The design is worked without an embroidery hoop and without a pattern. If you want to use an embroidery hoop, stitch your little piece of fabric onto a larger one, and cut out the middle of the large piece of fabric where the stitching will be done.
Stem design on black moire created with no pattern
Stem Stitch in embroidery floss is first
 
Embroider stem stitch in floss and leaves in silk ribbon
Leaves are Japanese ribbon stitch
Two-strand embroidery thread creates the circular stem with stem stitch (like a back stitch) and 4mm silk ribbon in pink, yellow and green are used for flowers and leaves.
Flower is pink 4mm silk ribbon with lazy daisy stitch
Flower is lazy daisy stitch with French knot center
 
Stitches are Japanese ribbon stitch, lazy daisy and a French knot in the center of the large flower.
 
Once you complete the front of the item, cut another cardboard circle to use for stiffener. Make it about an inch smaller in diameter than the original circle. Cut a piece of felt the same size as the cardboard circle.
 
Sew around the edge of the fabric and place the cardboard on the back inside the stitching. Gather it all around and backstitch a couple of times to secure the gathers. (I used a color you could see, but you'll want to use a color that matches the background fabric.) Cut the thread.
 
Stitch around the edge and pull to gather
Back with Cardboard Stiffener in Place
 
 
If you're making a piece of jewelry such as a pin or pendant, decide how you want to attach the pin. You can glue a metal purchased pinback to the cardboard, or punch it from front to back in the cardboard. A pendant can be hung with a purchased slide or you can use a piece of silk ribbon attached at the top before adding the felt back. A Christmas ornament can also hang with silk ribbon.
 
Secure the felt to the back with hand stitches along the edge or glue if you prefer. 
 
Completed Silk Ribbon Embroidery Miniature
Completed Design is about 2 1/4 inches


Here's a book that may give you some ideas for miniature designs. It's 
American School of Needlework's Big Book of 101 Little Ribbon Embroidery Designs with designs suitable for jewelry or Christmas ornaments.
 
Other ideas: You can use a large button instead of cardboard, and attach the fabric to the button before you start the embroidery. 

Monday, June 24, 2013

Vintage Quilt Pieces Make Interesting Sewing -- Creativity and Effort Required

Two rectangles or four nine-patch squares hand-cut and stitched
Grandma's Quilt Rectangles and Squares


Many half-completed crafts are available at garage sales and thrift shops, and there is no shortage of quilt scraps, squares, blocks and quilt tops. I usually only have to stop at one location each month to find something I don't need.
 
Recently, I stopped at a sale and found some 9-patch squares made by hand. These squares aren't made by a real quilter -- the colors are totally random, mismatched, and some of the "squares" are downright ugly. They aren't particularly well-made and I wouldn't call them quilt blocks. They look like the start of a possible quilt block. The price was right, so I came home with them. Some of the 9-patch squares were sewn together to make 18-patch rectangles and 36-patch blocks. The larger blocks look worse than the 9-patch, but somebody's Grandma spent hours making these.
 
Because I like old fabrics, unfinished projects have a charm (speaking of charm, maybe these could make a charm quilt) that I don't find in yardage from the nearest JoAnn's or Hancock store. These squares have taken over part of the coffee table for about a month, so it's time to move them out or do something with them. I took some of the 36-square blocks apart and worked on making something of them. It takes patience to make grandma's squares into blocks, but you'll have older fabrics and may shortcut a completed project if you can use some of the work already done.
 
Analyze the issues with any pre-owned quilt projects, just like these 9-patches. Other than the stitching issues (corners don't exactly meet and the stitching is a little curvy) they are all colors, and no theme colors. There are no solid colors to break up the design.
 
Sort some of the squares that have similar colors and shapes. These are approximately 4 1/2 inch squares, so I pressed some and measured squares to find similar sizes. Some weren't very usable because they didn't match at the seams, but some were larger than others, too.
 
Choose solid color fabrics that might work as a border with the squares to make a block. A window block might bring these to life. A four-pane window looks possible. Make a practice block to see the result. Here's the block I started:
Partially completed experimental design with vintage nine-patches
Nine-patch Squares With Mitered Border
 
You'll notice I left the strips longer than necessary. That's so I can make mitered corners or continue the design. Leave yourself some options when you're experimenting.
 
With the nine-patches already made, this will whip into a pillow or lap quilt in short order.
 
Here's a different design block that could work. The sides of the nine-patch are 4 1/2 inches so I made triangles from a 5 and 7/8 inch diagonal with 4 inch sides. I cut two triangles at a time and came out with a 6 1/2 inch block that will finish as a 6 inch block. Here it is untrimmed. Once you get several blocks made, square and size them with the rotary cutter. Grandma didn't have the benefit of many of the tools we use for quilting today.
Blue triangles added to nine-patch square completes a quilt block
Another Possibility for Working with Pre-Owned Nine-Patch Squares


Some suggestions I'll share:
 
When you're buying Grandma's work, buy clean, cared-for items that will withstand washing.
 
If you doubt the color fastness of the fabrics, wash them before you begin. Wash a few in a pan in the sink so you can see the fading, and rescue the ones that don't fade. Don't wash them in the washing machine
 
Press all the pieces and pieced work before you start. Sort by color, size, or usability. Be ruthless in sorting as some may be too horrible to use.
 
Work a sample block or two to see what's possible with what you have. Don't try to make a quilt or large item if the blocks aren't the same size or won't fit together.
 
If you're a perfectionist quilter, you may not be pleased with Grandma's handwork. That's ok, too, so don't buy it. Sometimes it's more rewarding to create something from new fabrics than to try to rescue someone's leftovers.
 
I've found some nice quilt blocks and tops in unusual places, and have made many pillows, baby quilts and full-size quilts from someone's incomplete sewing project. Don't pass on all of them -- you'll miss out on some creativity.
 
See you soon!
 
Linda
cajunC


Tuesday, April 30, 2013

Make a Sampler Quilt Top Easy and Interesting
six-panel fan appliqued on blue background square
Grandmother's Fan Applique Block
If you like to quilt, you've probably tried several different methods and may have made different styles of quilts. Most piecework involves piecing the same block in different colors of fabrics, but sometimes that gets boring.
Have you tried to make a sampler quilt with the same fabrics and different patterns for the blocks? You can make each block different and keep your interest level high. You can even choose to applique some blocks and piece others. So long as all of the blocks are the same size, your quilt will fit together. Repeating some or most of the fabrics will make it look like it's made to go together.
Block by Block by Beth Donaldson is a 1995 publication with 12-inch square blocks that could be used together to make a single quilt. That's the key to making a sampler quilt easily. This book doesn't have all the blocks I used, but it has enough to keep you busy and give you ideas for more. I also used Best Loved Quilt Patterns from Oxmoor House (1987) for more designs. Choose 10 1/2 inch, 12 1/2 inch, 14 1/2 inch or 16 1/2 inch squares so your blocks will line up without having to add individual sashing or additional pieces. We add the half inch for 1/4 inch seam allowance all around to have a full size square with an even number of inches when the quilt is completed.
Here's how to get started on this quilting project:
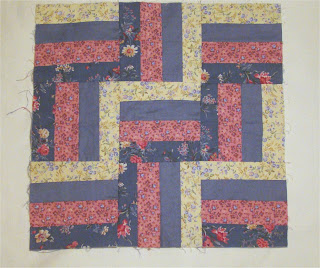
Choose your patterns. Patterns used in this quilt are 14-inch squares and include a six-section fan block, a log cabin block, a nine-patch with applique leaves, a butterfly applique, card trick pieced block, grandmother's fan applique on backing, rail fence, churn dash and a couple of others.
Blue and pink log cabin block with light and dark fabrics
Log Cabin Block
Choose the fabrics. You don't need many different ones. I chose blue and pink with beige for my sampler. You may want to select fabric for sashing strips between the blocks, too. Wash and press the fabric.
Cut any full-size squares you need for backing the applique designs. Remember to add the 1/2 inch for seam allowance. Sometimes I cut these an inch larger than I need and trim after the applique is done. For a 14-inch block, I make the backing square 15 1/2 inches, then trim to 14 1/2 after the applique is completed. That allows for any shrinkage from complex applique stitching. 
Butterfly applique with needle-turned edge on blue print fabric
Applique Butterfly Block
Use a rotary cutter for cutting squares, rectangles and triangles for quilt blocks, but use sharp scissors for applique pieces. If you're hand appliqueing the design, add 1/4 inch to all outer edges to fold under. Where the fabrics overlap, don't add to the applique piece that will be on the bottom since it doesn't have to be folded under. The wings of the butterfly where the body is appliqued over them is an example of overlap that doesn't need the 1/4 inch addition.
If you're machine appliqueing the design, don't add to the template. You can use a fiber bonding fabric like HeatnBond or Wunder-Under on the applique pieces, but they won't have the softness of a cotton quilt.
Blue on Beige with Combination Pieced Block and Applique
Nine-Patch with Applique
If you use freezer paper for hand applique, cut the freezer paper to the size of the template. Apply the freezer paper shiny side up (wrong sides together) to the back of the cut applique piece and turn the 1/4 inch fabric edge with an iron, or you can use your needle to turn the fabric under as you work around the edge. 
Card Trick block looks like applique but it is patchwork
Card Trick Block
Trim all the blocks to the same size, allowing 1/2 inch for seams. Your blocks should be 14 1/2 inches square at this point if you're working with 14-inch blocks.

Strip of four fabrics cut into blocks and turned different ways to make rail fence
Rail Fence Patchwork Block
Once you've made individual blocks of different kinds but with similar or the same fabrics, you're ready to design your quilt. Sashing between the quilt blocks will make a larger quilt and require fewer blocks. You can also add a row or two of sashing around the outer edges to make the quilt larger. Sashing works  with square blocks but not for blocks set on point (like diamonds). 
Triangles in solid color give appearance of background
X-Patch Block
Before you finalize your sashing choice, lay the fabric out on a flat surface and place your quilt blocks on it to see the effect. I used a small beige and brown background print for this one.
Quilt blocks laid on fabric to see how  they look.
Lay Your Blocks on Sashing Fabric Before Cutting
If it's not what you want, look through your fabric stash and try some other fabrics until you get one you want to work with. Wash it if you haven't already, and cut the sashing in 3 1/2 inch, 4 1/2 inch or 5 1/2 inch width, as you'll need the 1/2 inch for 1/4 inch seams.
I cut sashing parallel to the selvage -- it stretches less. If you start at the selvage edge, trim off the bound selvage edge, then cut your first strip at the cut edge and work across the doubled fabric. That way, if you have fabric left over, it will be near the fold. The remaining piece will be folded, giving you a larger surface for your next project. You may even have enough for backing blocks for more appliques.

P.S. Before I complete this quilt, I'll take the lace off the Grandmother's Fan block. I may add a feather stitch or an embroidery stitch I use for crazy quilting, or even eyelet lace would work. The thin lace will wear out before the other fabrics and is impractical for a usable quilt. Quilting is always a learning experience!

Thursday, March 28, 2013

Make a Shoulder Pad Angel Easy Crafts Instructions

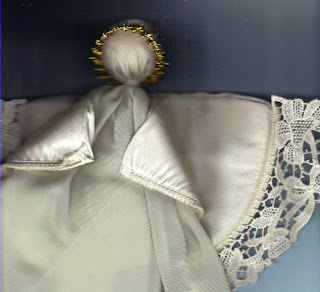
Completed angel made from two shoulder pads
Shoulder Pad Angel Easy Crafts

We recycle almost everything, and shoulder pads are ready-made padded shapes for 3-dimensional crafts. We've shown you how to make a butterfly, and promised we'd find the angel -- but we didn't -- so we started over and wrote out new instructions. 

You can see what we did with a few folds and a couple of seams. 

Here's what you need: 

Two shoulder pads in the semi-circle shape
Lace, eyelet, or whatever you like for trim for the wings
Large hankie or fabric about 16 inches square
1 1/4 inch Styrofoam or wooden ball for head
Twist ties
Ribbon for halo
Sewing thread to match shoulder pads and 16 inch hankie or fabric square.
Two shoulder pads needed for crafting tree topper or mantel display.
Ecru Shoulder Pads Removed from a Blouse

Add lace trim all the way around one shoulder pad.
Lace sewn to wings with straight stitching
Single Shoulder Pad with Lace Added

Stitch around the 16-inch square of fabric so the edge is finished, unless you plan to use it for a centerpiece or mantel with the skirt covered. You can add lace all the way around the fabric square if you're planning to use it for a tree topper. 

Fold the fabric square diagonally in a triangle with the stitched side inside. Place the Styrofoam ball or wooden ball inside the fabric in the center. Use a twist tie or thread to secure the ball in the center.

Fabric folded diagonally with ball for head enclosed
Place Ball for Head in Center of Diagonal Folded Fabric Square
Create a halo with ribbon. You can place the ribbon around the "head" like we did here or if you prefer, wrap the ribbon around a twist tie. Shape it like an eyelet screw or a lollipop, a circle with a stick. Push the stick end to the back and hook it on the twist tie at the neck.
Angel head tied with twist tie and ribbon halo
Make Halo from Ribbon with or without Twist Tie

Place the shoulder pad without the lace around the "shoulders" below the twist tie and stitch in place from the back. If you want to have the inside of the angel's gown open to place over a tree or other item, stitch the shoulder pad in the center to the center of the back of the gown. Wrap it around the front of the gown and stitch the corners of the shoulder pad together.
Shoulder pad angel pictured with cape
Wrap Shoulder Pad Cape Around Shoulders and Attach at Back

Attach the shoulder pad with lace as wings to the back in the same location as you stitched the "cape" to the gown.
Angel wings with lace attached to back of figurine taking shape.
Attach Shoulder Pad Wings to Back of Angel

Create a face on your angel if you choose. Use fabric paints for cheeks, lips and eyes. You can use this angel for a tree topper, centerpiece or mantel, or let her hang from a corner display.

You can also make small angels for tree ornaments with single shoulder pads. Zigzag stitch two semicircles on one shoulder pad. Cut the semicircles from the shoulder pad and follow directions from the top here to add lace to one. Use a 1/2 inch Styrofoam ball for the head and a 6 to 8 inch square for the gown.

Make it fun!

Linda